Preparation
Install Vscode
Vscode can be downloaded by going to its official website
Go to the official website and click the button to download:

Once the download is complete, open the installation software to install
Install extension
After installing Vscode, you need to install the following two extensions:
Code RunnerCodeLLDB
Install Code Runner
Search for Code Runner within the extension.

Click Install to complete the installation. After successful installation, the interface is as follows:

Install CodeLLDB
Search for CodeLLDB within the extension to download and install it.

Configuration extensions
Code Runner Configuration
Open Extended Settings for Code Runner

Follow the configuration below:
Code-runner: Clear Previous Output √

Code-runner: Ignore Selection √

Code-runner: Preserve Focus ×

Code-runner: Run In Terminal √
Code-runner: Save All Files Before Run √
Code-runner: Save File Before Run √

Configuration of CodeLLDB
Open the extension configuration of CodeLLDB

changeLldb › Launch: Terminal
Where:
integrated is the integrated terminal output using Vscode
external is output using an external terminal

Write the first program
First, find a location to create a new folder for your program. In Vsocde’s File->Open Folder select the folder you just created. Below, I have created a new folder TEST as an example:

Create a new c/cpp file, using hello.c as an example for this tutorial.

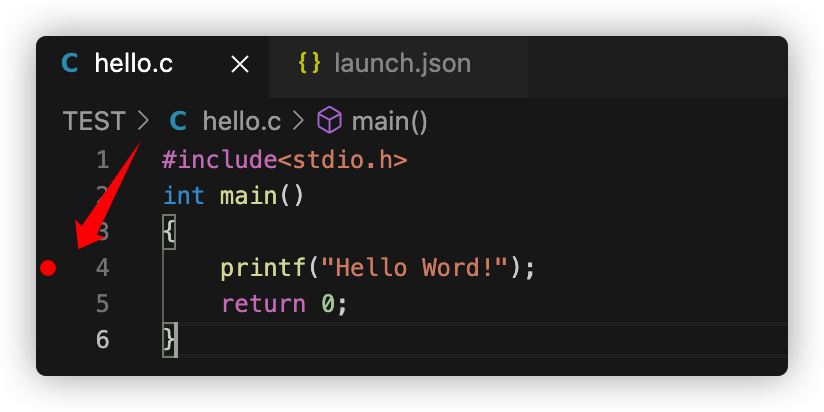
Take the following test code as an example:
|
|
Run the first program
Click on ▶️ in the upper right corner to run the program

You can see that “Hello Word!” has been successfully output in Vscode’s terminal!

Debugging the first program
One click on Debugging -> Run and Debug -> C++ (GDB/LLDB)

Select clang-generate and debug active files.

At this point, the Launch.json file will pop up, please copy the following code into your Launch.json file:
|
|
Returning to the hello.c file we just had, with a new breakpoint! debug-breakpoint
Click Run->Start Debugging

